 Save
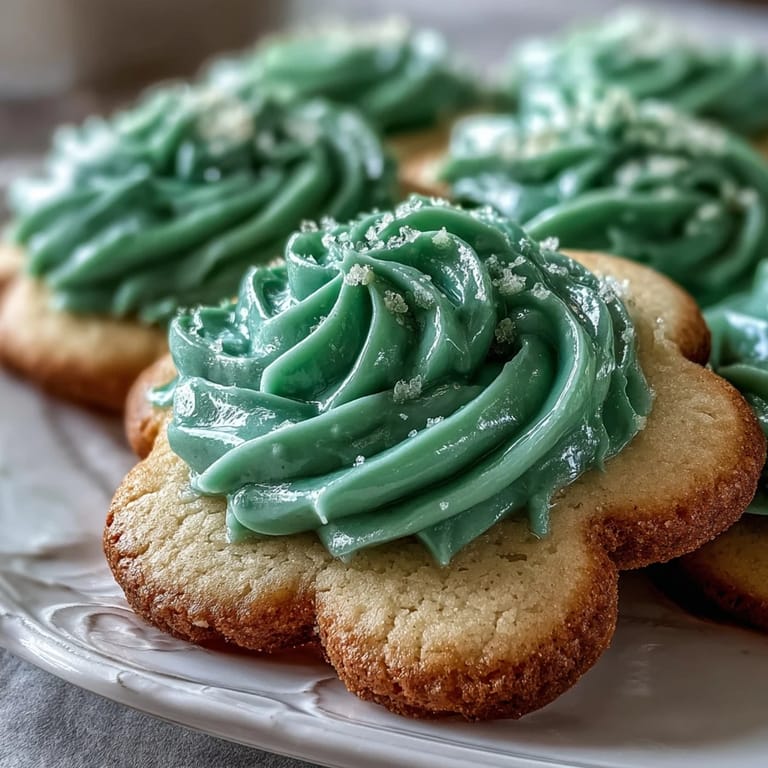
Save Every March, my kitchen transforms into a small factory of green-tinted chaos, and honestly, I wouldn't have it any other way. Years ago, a friend brought these shamrock cookies to a St. Patrick's Day gathering, and the moment I bit into one—that buttery sweetness paired with silky royal icing—I was hooked. Now I make them every year, and somehow they've become the one thing people actually ask me to bring. What started as a casual baking project has turned into a tradition I genuinely look forward to, even if my counters end up dusted with powdered sugar for days.
I'll never forget the year my mom helped me pipe the icing while we listened to terrible Irish music and laughed until our sides hurt. She'd never decorated cookies before, and her shamrocks looked like they'd survived a small earthquake, but she didn't care one bit. By the end of the afternoon, we had dozens of imperfectly beautiful cookies and a memory that's stuck with me ever since.
Ingredients
- All-purpose flour (2 1/2 cups): This is your cookie foundation, and measuring by weight if you have a scale makes a real difference in consistency.
- Baking powder (1/2 teaspoon): Just enough to give the cookies a subtle lift without making them cake-like or puffy.
- Salt (1/4 teaspoon): Seems like nothing, but it genuinely brightens the buttery flavor and shouldn't be skipped.
- Unsalted butter (3/4 cup, softened): Softened means it should feel almost squishy when you press it—this is how you get that light, fluffy base.
- Granulated sugar (1 cup): The sweetness that makes these cookies sing, and creaming it properly with butter changes everything.
- Large egg (1): Acts as a binder and adds structure; make sure it's at room temperature so it blends smoothly.
- Vanilla extract (2 teaspoons) and almond extract (1/2 teaspoon, optional): Vanilla is non-negotiable, but the almond adds a whisper of sophistication if you want it.
- Powdered sugar (3 cups, sifted): Sifting matters here because lumps in royal icing are frustrating and never fully dissolve.
- Egg whites (2 large) or meringue powder plus water: The icing comes alive when these are whipped into stiff peaks; meringue powder is safer if you're concerned about raw eggs.
- Green gel food coloring: Gel holds its vibrancy better than liquid coloring and won't make your icing too thin or watery.
Tired of Takeout? 🥡
Get 10 meals you can make faster than delivery arrives. Seriously.
One email. No spam. Unsubscribe anytime.
Instructions
- Mix your dry ingredients:
- Whisk the flour, baking powder, and salt in a medium bowl and set it aside. This ensures everything is evenly distributed before you fold it into the dough.
- Cream butter and sugar until fluffy:
- Beat them together for a solid 2 to 3 minutes until the mixture looks pale and airy, almost like pale sand. This step is where the cookies get their tender, delicate crumb.
- Add the egg and extracts:
- Mix them in until everything looks smooth and combined, scraping down the bowl as needed. Don't overmix once you add the dry ingredients.
- Bring the dough together:
- Gradually fold the dry mixture into the wet ingredients using a spatula or wooden spoon, stirring just until you don't see streaks of flour anymore. The dough should come together without being worked too hard.
- Chill and divide:
- Split the dough in half, shape each piece into a disk, wrap them in plastic wrap, and let them rest in the fridge for at least an hour. Cold dough is easier to roll out and cut without sticking.
- Roll, cut, and bake:
- Preheat your oven to 350°F while you roll the dough to about 1/4-inch thickness on a lightly floured surface. Cut out shamrocks and bake for 9 to 11 minutes until the edges just barely start to turn golden—they'll firm up as they cool.
- Make the royal icing:
- Beat powdered sugar and egg whites (or meringue powder with water) until stiff peaks form and the icing looks glossy and thick, which takes about 5 minutes of steady beating. This is when you divide it into bowls and tint with green gel coloring.
- Decorate with intention:
- Pipe an outline around each cookie first, then flood the center with thinned icing (add a tiny splash of water if needed). Add sprinkles or glitter while the icing is still wet, then let everything set for at least an hour before serving.
 Save
Save There's something genuinely magical about watching someone's face light up when they bite into one of these cookies—that perfect balance of buttery sweetness and that silky icing texture. These little shamrocks have a way of turning ordinary afternoons into celebrations, which is probably why I keep making them year after year.
The Art of Royal Icing
Royal icing used to terrify me, but once I understood it's really just three ingredients whipped together, everything clicked. The key is patience—don't rush the beating process, and don't panic if it looks grainy at first, because it smooths out. If you're nervous, start with meringue powder instead of raw egg whites; the texture is almost identical and you skip the food safety worry entirely.
Make-Ahead Magic
One of my favorite discoveries is that these cookies actually taste better after a day or two, which means you can bake them the day before your gathering and focus on other things. Store them in an airtight container between parchment layers, and they'll stay fresh for up to five days. The icing stays glossy, the cookies stay tender, and you get to actually enjoy the party instead of stress-baking in your kitchen.
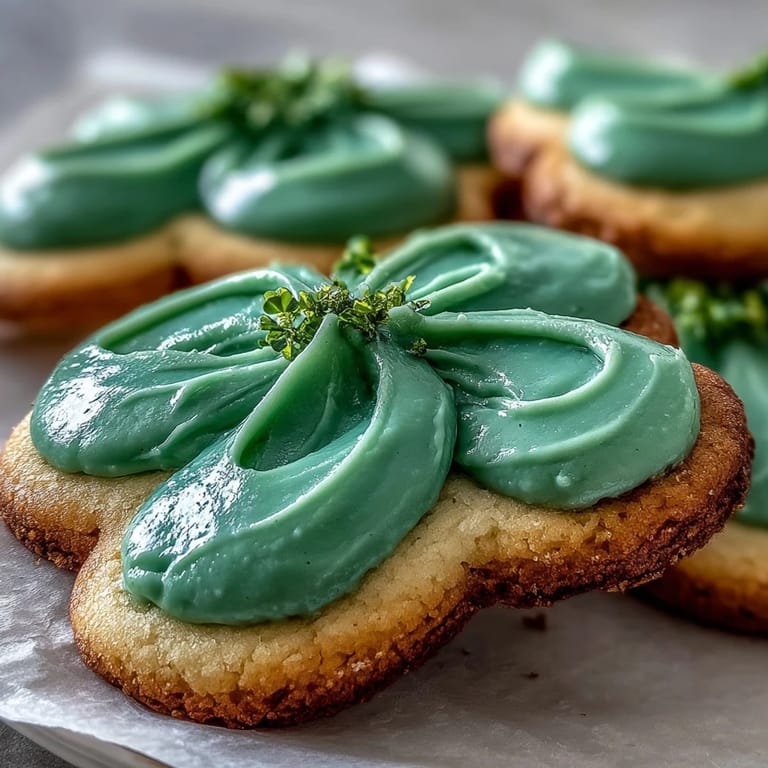
Customizing Your Shamrocks
These cookies are a canvas, honestly, and I love thinking about different ways to decorate them depending on the mood or occasion. You can pipe delicate patterns into the icing, dust them with edible glitter while they're still wet, or keep them minimalist and elegant with just solid green coating. I've also experimented with different icing colors—gold, white, even pastels—and each version feels like its own little celebration.
- Outline and flood technique gives the most polished, bakery-style finish if you're willing to spend the time.
- White icing with green accents creates a classy contrast that feels less intensely festive if that's more your vibe.
- Add edible glitter or pearl dust while the icing is still tacky for a shimmering, celebratory touch.
 Save
Save These shamrock cookies have taught me that baking doesn't have to be complicated to be worthwhile, and that sometimes the most meaningful recipes are the ones we return to again and again. Make them once and you'll understand why they've become a St. Patrick's Day essential in countless kitchens.
Recipe FAQ
- → What ingredients give these cookies their buttery texture?
Unsalted softened butter combined with sugar creates a tender and rich cookie base that yields a buttery texture.
- → How do I achieve smooth, glossy royal icing?
Beat powdered sugar with egg whites or meringue powder and a touch of vanilla or lemon juice until stiff peaks form for a smooth and glossy finish.
- → What is the purpose of chilling the dough before baking?
Chilling firms up the dough, preventing spreading during baking and helping retain the distinct shamrock shape.
- → Can I substitute almond extract for allergies?
Yes, almond extract is optional and can be omitted or replaced with extra vanilla extract to avoid nut allergens.
- → How long should the icing set before serving?
Allow icing to set for at least one hour at room temperature to ensure a firm and glossy finish on the cookies.
- → Are there alternatives to egg whites in royal icing?
Meringue powder mixed with water serves as a safe and stable substitute for fresh egg whites in the icing.