 Save
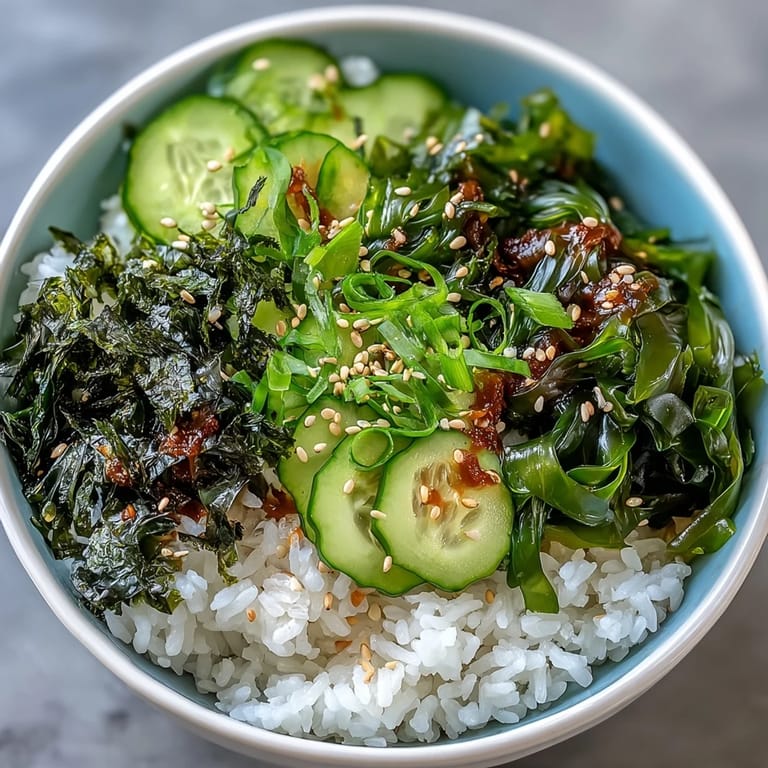
Save One afternoon, I was standing in my kitchen watching the steam rise off a pot of freshly cooked sushi rice, and it hit me that I didn't need to order takeout to eat well. The smell of rice vinegar mixing with warm grains felt like an instant trip to a tiny sushi bar I'd visited once, except this time I was making it myself. That's when I realized this bowl—simple, beautiful, and completely doable in under 40 minutes—could become my go-to weeknight dinner. The umami from the nori and seaweed makes every bite feel intentional and satisfying, not like I was cutting corners.
I made this for a friend who'd been feeling rundown, and watching her face light up when she took that first bite reminded me why food matters. She said it tasted clean and energizing, like her body knew it was getting something real. We sat on the porch eating these bowls, talking about nothing important, and it became one of those moments where the meal was just the excuse to be present together.
Ingredients
- Sushi rice (1 cup): This short-grain rice has the right starch content to stay tender and slightly sticky when cooked, which is what holds everything together and makes each bite cohesive.
- Water (1¼ cups): The ratio matters here—too much and your rice gets mushy, too little and you're left with crunchy grains, so measure carefully.
- Rice vinegar (2 tablespoons): This adds the signature tangy sweetness that makes sushi rice taste like sushi rice, bringing brightness that balances the umami from the seaweed.
- Sugar (1 tablespoon) and salt (½ teaspoon): Together these dissolve into the warm rice and create that subtle sweetness and seasoning that feels sophisticated without tasting sugary.
- Nori sheets (2, cut into strips): Buy the seaweed sheets that are meant for sushi, not the heavily seasoned snacking kind—they'll toast slightly when you cut them and release that deep ocean flavor.
- Dried wakame seaweed (¼ cup, rehydrated): This expands dramatically in water, so don't skip the rehydration step or you'll end up with too much seaweed or too little, depending on how you measure.
- Cucumber (1 small, thinly sliced): The crispness cuts through the richness of the seasoned rice and adds a refreshing textural contrast that keeps the bowl from feeling heavy.
- Scallions (2, thinly sliced): A gentle onion flavor that ties everything together without overpowering the delicate seaweed and rice.
- Toasted sesame seeds (1 tablespoon): Buy pre-toasted or toast them yourself for 2 minutes in a dry pan—the toasted version has way more nutty depth than raw seeds.
- Pickled ginger (1 tablespoon, optional): This adds a sharp, cleansing bite between bites, helping reset your palate and keeping the eating experience lively.
- Furikake (1 tablespoon, optional): This Japanese seasoning blend brings a hit of umami and nori flavor, though check the label if you're avoiding fish or gluten.
- Soy sauce (to taste): Drizzle it on at the table so each person can control how salty their bowl gets, since the rice is already seasoned.
Tired of Takeout? 🥡
Get 10 meals you can make faster than delivery arrives. Seriously.
One email. No spam. Unsubscribe anytime.
Instructions
- Rinse and cook the rice:
- Hold your rice under cold running water and swirl it with your fingers until the water runs completely clear—this removes excess starch that would make the rice gluey. Once it's rinsed, combine it with 1¼ cups water in a saucepan, bring to a boil, cover tightly, drop the heat to low, and let it cook untouched for 15 minutes until the water disappears completely.
- Season while warm:
- Mix your rice vinegar, sugar, and salt together, then microwave for 20 seconds so the sugar dissolves into the liquid. Fold this mixture gently into the warm (not hot) rice using a rice paddle or wooden spoon, being careful not to mash the grains.
- Prepare the seaweed:
- Follow your wakame package instructions to rehydrate it—usually it takes just 5 minutes in water. Drain it well so it doesn't make your rice bowl soggy, then use scissors or a knife to cut your nori sheets into thin, easy-to-eat strips.
- Assemble the bowl:
- Divide the seasoned rice between two bowls, then arrange the wakame, nori strips, cucumber slices, and scallions on top in whatever pattern makes you happy. The rice doesn't need to be completely covered—you want to see the different colors and textures.
- Finish and serve:
- Sprinkle sesame seeds over everything, add furikake if you're using it, and set a small pile of pickled ginger on the side. Serve immediately with soy sauce so people can drizzle as much as they like.
 Save
Save There's something grounding about eating a bowl of rice and seaweed that makes you feel connected to the ocean and the earth at the same time. It became my quiet lunch ritual, something I'd make when I needed to slow down and actually taste what I was eating instead of rushing through another meal at my desk.
Why This Bowl Works
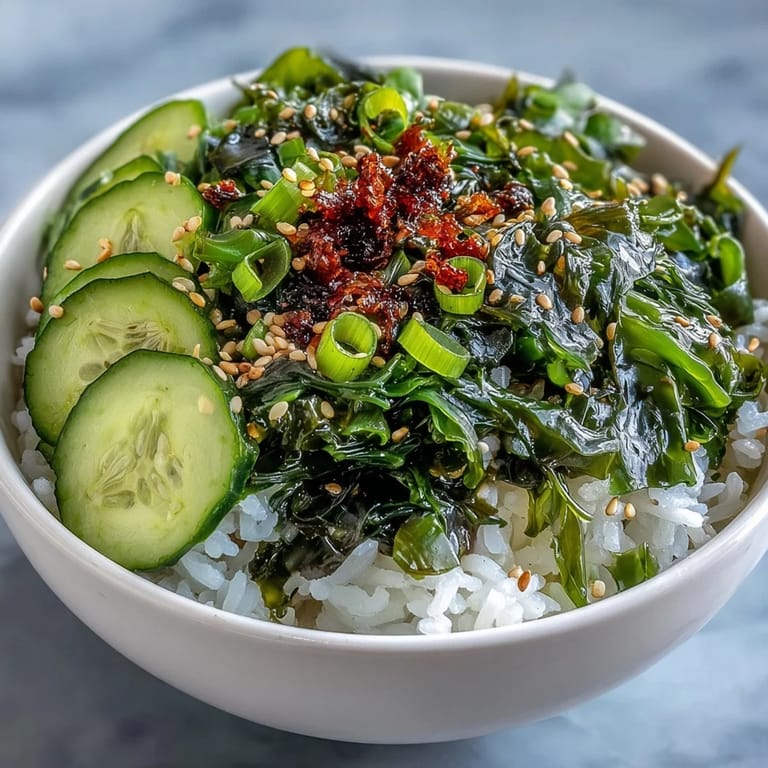
The genius of this rice bowl is that it relies on contrast—soft rice against crispy nori, mild sweetness against umami depth, warm components alongside cool cucumber. Every element has a reason to be there, and none of them fight for attention, which is why it feels so balanced and complete. The seaweed doesn't just add flavor; it adds a whole conversation about texture and depth that plain rice could never achieve alone.
Customizing Your Bowl
Once you've made this bowl a few times, you'll start seeing it as a template rather than a strict recipe, which is where the real fun begins. I've added avocado for creaminess, shredded carrots for sweetness, edamame for protein, and even a soft-boiled egg for richness, and every version felt like it was made just for that moment. The rice and seaweed are the anchor that holds everything together, so feel free to riff on the vegetables and garnishes based on what's fresh and what your body is craving that day.
Timing and Make-Ahead Tips
The whole bowl comes together in about 35 minutes, but you can make components ahead and assemble everything at the last minute. I often cook the rice in the morning and store it in the fridge, then do my vegetable prep right before lunch, which keeps the cucumber crisp and the nori from getting soft. If you're feeding more than two people, just scale up the rice proportionally and multiply the toppings—the rice will take slightly longer to cool, but everything else stays exactly the same.
- Cooked seasoned rice keeps in the fridge for up to 3 days, so meal prep becomes effortless once you've got it ready.
- Cut your vegetables just before serving so they stay at their crispest, which is what makes the textural contrast sing.
- Toast your sesame seeds fresh if you can, because they lose their punch after sitting around, but pre-toasted works fine in a pinch.
 Save
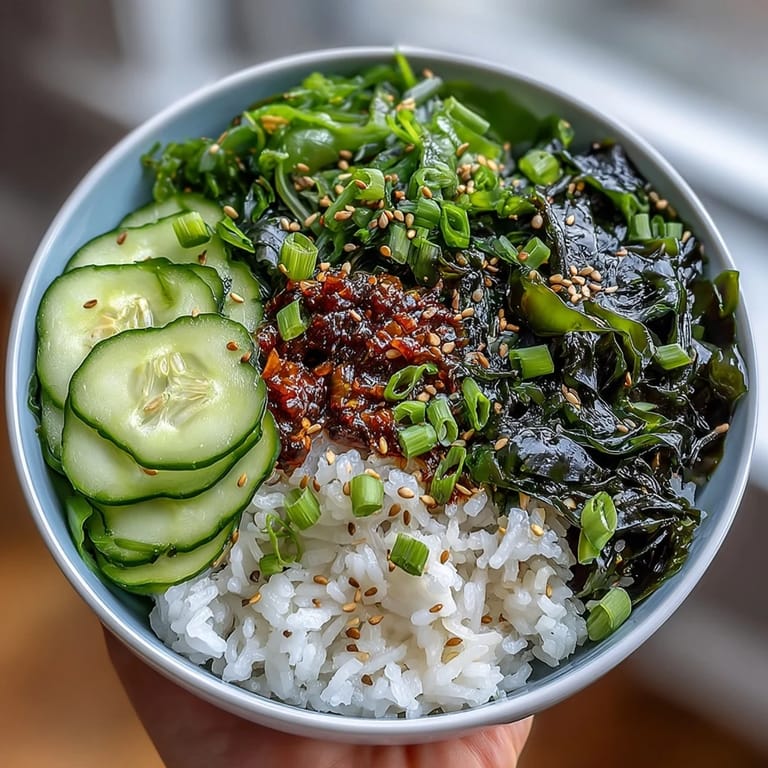
Save This bowl became more than dinner for me—it's proof that simple, humble ingredients can deliver something that feels special and nourishing. Make it once and you'll understand why it works, then make it a hundred times because it's exactly what you needed.
Recipe FAQ
- → How do I properly cook sushi rice?
Rinse sushi rice under cold water until clear to remove excess starch. Cook it with water covered on low heat for 15 minutes, then let stand, covered, for 10 minutes before seasoning.
- → What is the best way to rehydrate dried wakame seaweed?
Soak dried wakame in cold water following package instructions until it expands and softens, then drain well before adding to the dish.
- → Can I substitute furikake in this dish?
Yes, furikake adds flavor and texture but can be omitted or replaced with toasted sesame seeds and a splash of soy sauce for a similar umami boost.
- → How can I make this meal more protein-rich?
Add toppings like marinated tofu or a soft-boiled egg to increase protein while keeping the dish balanced and flavorful.
- → What tools do I need to prepare this bowl?
A saucepan with lid for cooking rice, a sharp knife for slicing vegetables and nori, cutting board, mixing bowls, and a spoon or rice paddle for folding seasoning into rice.