 Save
Save I discovered these bars on a Tuesday afternoon when I'd forgotten to pack snacks and found myself raiding the pantry at 3 PM with nothing but bananas, peanut butter, and oats staring back at me. Two hours later—after mixing, pressing, and chilling—I had something that tasted like a guilty pleasure but felt actually nourishing. My kid grabbed one without asking and declared it better than store-bought, which meant I'd accidentally stumbled onto something worth repeating.
The first time I brought these to a potluck, I almost didn't bother—they seemed too simple, too humble for sharing. But watching people come back for thirds while genuinely asking for the recipe made me realize that sometimes the best foods are the ones that don't announce themselves loudly. Now I make them most weeks, usually on Sunday mornings when the kitchen is quiet and I can think clearly about the week ahead.
Ingredients
- Ripe bananas: Choose ones with brown spots; they're sweeter and mash more easily into that creamy texture you're after.
- Creamy peanut butter: The natural stuff works beautifully and adds depth that sweetened versions can't match.
- Honey or maple syrup: This is your binder and sweetness in one, so don't skip it or the bars fall apart when you cut them.
- Vanilla extract: A small dose that somehow makes everything taste more like itself.
- Old-fashioned rolled oats: The texture hero—don't substitute quick oats or you'll end up with mush.
- Walnuts or pecans: Optional but worth it for a toasted, subtle crunch that keeps things interesting.
- Mini chocolate chips: Also optional, but if you're adding them, dark chocolate works better than milk chocolate here.
- Salt: Balances the sweetness and makes the peanut flavor pop.
- Ground cinnamon: A warm whisper that ties everything together.
Tired of Takeout? 🥡
Get 10 meals you can make faster than delivery arrives. Seriously.
One email. No spam. Unsubscribe anytime.
Instructions
- Prepare your pan:
- Line an 8x8-inch square pan with parchment paper, letting it overhang the sides like you're setting up an easy escape route for the finished bars.
- Mash those bananas:
- Use a fork or masher to break them down until smooth—some small lumps are fine and actually add character. This takes maybe two minutes and feels meditative.
- Build the wet base:
- Stir your mashed bananas with peanut butter, honey, and vanilla until everything is glossy and combined, like you're making a luxurious paste.
- Fold in the dry ingredients:
- Add oats, salt, cinnamon, and any mix-ins, stirring until the mixture holds together and every oat flake is coated. The dough should feel thick and intentional.
- Press into the pan:
- Spread the mixture evenly, then use the back of a spoon or spatula to press it firmly and compactly—this is where you set the texture for everything that comes next.
- Chill until set:
- Refrigerate for at least an hour until the bars are firm enough to cut cleanly without crumbling into sadness.
- Cut and store:
- Use the parchment overhang to lift the whole block out, then slice into 12 bars with a sharp knife. Store in an airtight container in the fridge for up to a week.
 Save
Save There's something almost magical about handing someone a homemade snack that tastes like dessert but actually gives them energy instead of a crash. These bars have become my quiet way of saying I was thinking of you without making a big production out of it.
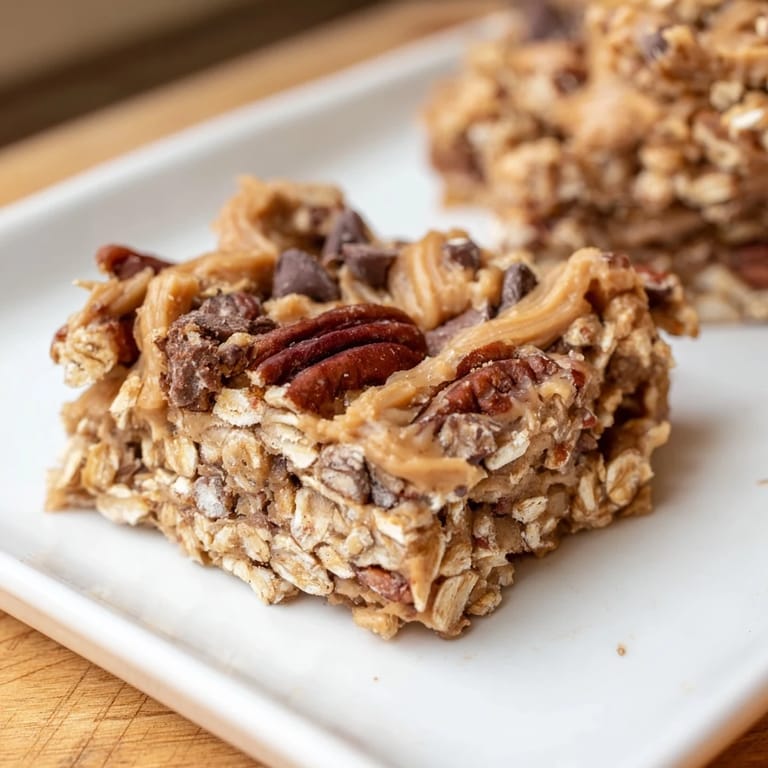
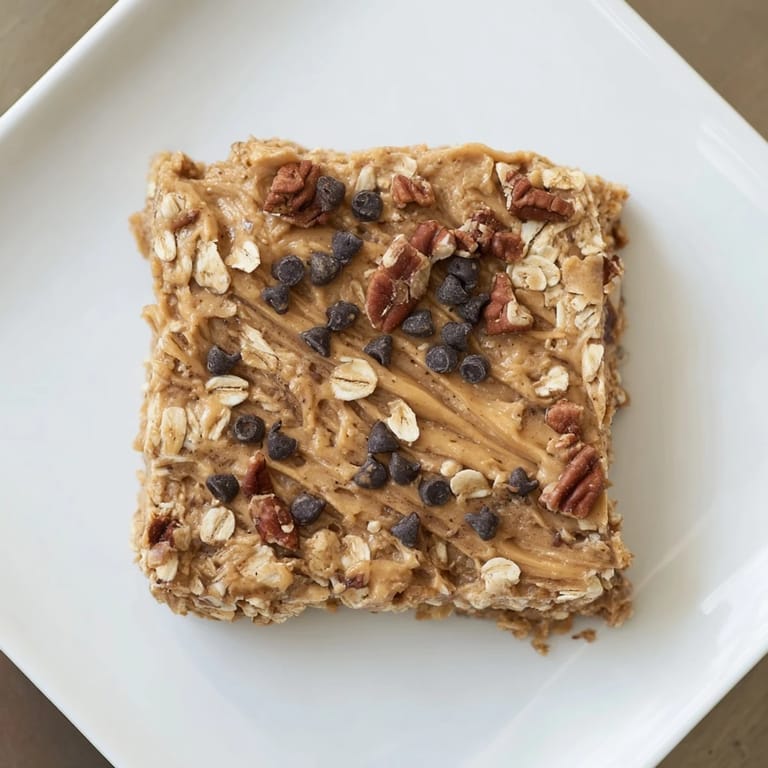
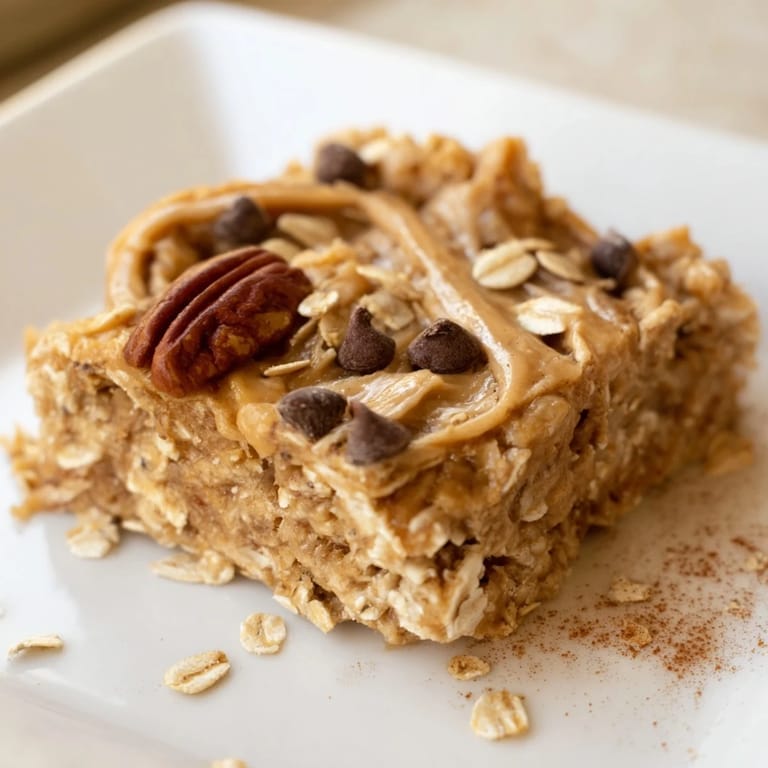
Texture and Taste
These bars hit that sweet spot between chewy and substantial—dense enough to feel satisfying but never dry or crumbly. The peanut butter provides richness and creaminess, the banana adds natural sweetness and moisture, and the oats contribute that wholesome backbone that makes them feel less like candy and more like actual nourishment. If you add nuts, you get pockets of subtle toastiness; chocolate chips add little bursts of sweetness that keep things from feeling one-note.
Making Them Your Own
The beauty of this recipe is how forgiving it is when you want to experiment. I've added a tablespoon of cocoa powder for chocolate-peanut butter vibes, swapped in almond butter when peanut wasn't around, and once mixed in some freeze-dried strawberries on a whim—all worked beautifully. The ratio of wet to dry ingredients is stable enough that you can play around without sabotaging the whole batch. Just remember that anything you add is replacing oats volume-for-volume to maintain the texture.
Storage and Portability
These are genuinely one of the best portable snacks because they hold up without being wrapped individually, though wrapping them does help if you're tossing them into backpacks or lunch boxes. They keep in the fridge for about a week, and they even survive a few hours at room temperature if you're traveling or at work. I've found they're sturdier than most homemade bars and actually taste better cold—the flavors feel more concentrated and the texture is perfectly chewy.
- Individual plastic wrap keeps them fresh longer and makes them grab-and-go perfect.
- If you forget them in a warm bag, they'll soften but still taste good—they won't go bad.
- Freezing works too if you want to make a double batch and save some for later.
 Save
Save These bars have quietly become a staple in my kitchen because they ask so little and deliver so much. Whether you make them exactly as written or customize them to your taste, they're proof that the best snacks are often the simplest ones.
Recipe FAQ
- → What gives these bars their chewy texture?
The combination of ripe bananas and creamy peanut butter binds the oats, creating a soft, chewy consistency without baking.
- → Can I substitute peanut butter for another nut butter?
Yes, almond or sunflower seed butter can be used as alternative spreads, offering a different but delicious flavor profile.
- → How long should the bars chill before slicing?
Refrigerate the mixture for at least one hour to allow it to firm up, ensuring easy slicing and holding its shape.
- → Are there options to add extra flavor or texture?
Optional ingredients like chopped walnuts, pecans, mini chocolate chips, or dried fruits such as cranberries or raisins enhance taste and crunch.
- → How should these bars be stored for freshness?
Store the bars in an airtight container in the refrigerator for up to one week to maintain their chewiness and flavor.