 Save
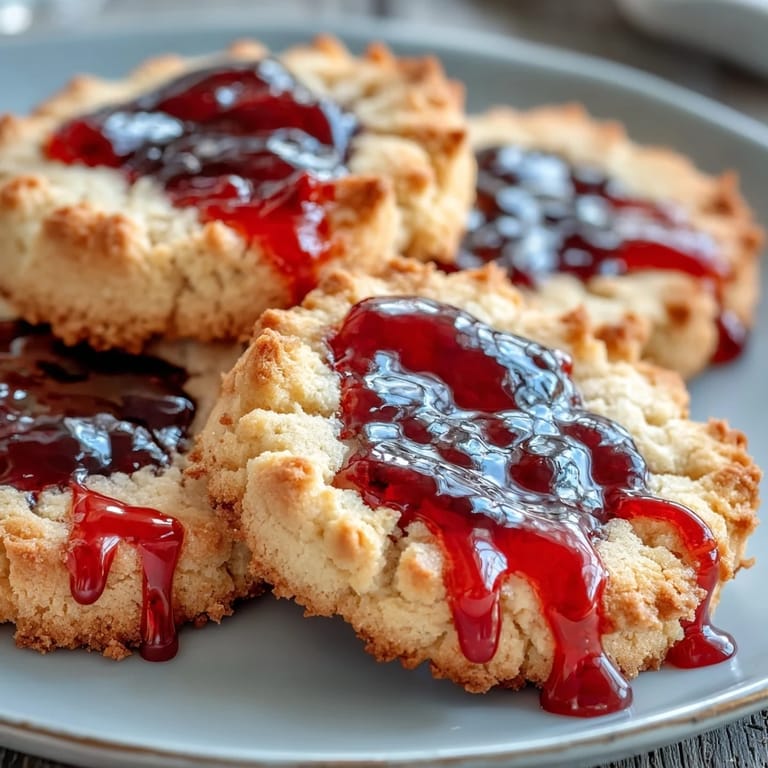
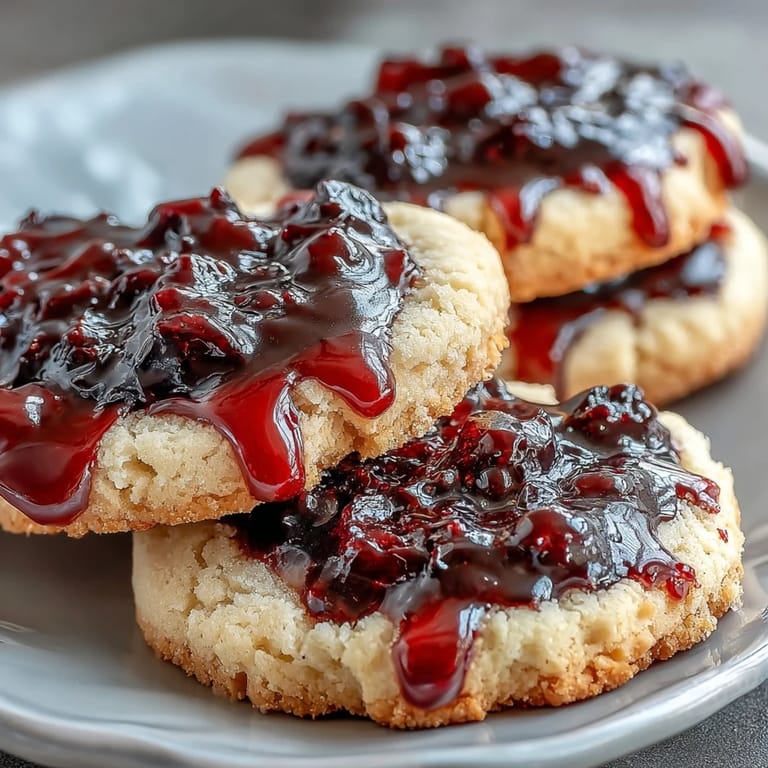
Save When Halloween arrives, there's no sweeter way to embrace the spooky season than with these hauntingly delicious Vampire Bite Sugar Cookies. Imagine soft, buttery sugar cookies bearing the dramatic mark of a vampire's fangs, with glossy red icing dripping like fresh blood from two perfectly placed puncture wounds. These aren't just cookies—they're edible theater, designed to delight both kids and adults at your Halloween gathering. The classic sugar cookie base provides the perfect canvas for this theatrical presentation, while the blood-red icing adds just the right touch of gothic drama without being too scary for younger ghosts and goblins.
Save The beauty of these vampire bite cookies lies in their simplicity paired with striking visual impact. The soft, tender sugar cookie is made from pantry staples you likely already have on hand—butter, sugar, flour, and vanilla. What transforms them from ordinary to extraordinary is the clever use of a simple straw or chopstick to create realistic fang marks, followed by a drizzle of vibrant red icing that mimics dripping blood. The addition of light corn syrup to the icing creates an authentic glossy sheen that makes the effect even more convincing. Whether you're hosting a Halloween party, contributing to a school bake sale, or simply want to bring some festive fun to your dessert table, these cookies deliver maximum impact with minimal effort.
Ingredients
Tired of Takeout? 🥡
Get 10 meals you can make faster than delivery arrives. Seriously.
One email. No spam. Unsubscribe anytime.
- For the Sugar Cookies: 2 1/4 cups (280 g) all-purpose flour, 1/2 tsp baking powder, 1/4 tsp salt, 3/4 cup (170 g) unsalted butter (softened), 1 cup (200 g) granulated sugar, 1 large egg, 1 1/2 tsp pure vanilla extract
- For the Red Blood Icing: 1 cup (120 g) powdered sugar (sifted), 2–3 tsp milk, 1/2 tsp light corn syrup (for shine), red gel food coloring
- For Decoration: Black or dark red gel icing (optional, for detail)
Instructions
- Step 1: Prepare Your Oven and Baking Sheets
- Preheat oven to 350°F (175°C). Line two baking sheets with parchment paper.
- Step 2: Mix the Dry Ingredients
- In a medium bowl, whisk together flour, baking powder, and salt. Set aside.
- Step 3: Cream Butter and Sugar
- In a large bowl, beat butter and granulated sugar until light and fluffy (about 2 minutes).
- Step 4: Add Wet Ingredients
- Add egg and vanilla, mixing until combined.
- Step 5: Form the Dough
- Gradually add the flour mixture, beating on low until a soft dough forms.
- Step 6: Shape the Cookies
- Scoop tablespoon-sized portions, roll into balls, and place 2 inches apart on prepared sheets. Flatten slightly with your palm.
- Step 7: Bake
- Bake for 10–12 minutes, or until edges are just golden. Cool on baking sheets for 5 minutes, then transfer to a wire rack to cool completely.
- Step 8: Create the Vampire Bites
- Use a straw or the end of a chopstick to gently poke two bite marks near the edge of each cooled cookie.
- Step 9: Prepare the Blood Icing
- For the icing: In a small bowl, mix powdered sugar, milk, corn syrup, and red food coloring until a thick but pipeable consistency is reached.
- Step 10: Decorate with Blood
- Using a toothpick or small piping bag, fill the bite marks with red icing, letting it drip slightly for a bloody effect.
- Step 11: Set
- Let icing set before serving.
Preparation Tips
For best results, chill your cookie dough for 30 minutes if you're working in a warm kitchen—this makes the dough easier to handle and prevents excessive spreading during baking. When creating the vampire bite marks, wait until the cookies are completely cool to avoid cracking. The spacing of the two fang marks should be about half an inch apart for the most realistic vampire bite effect. When mixing your red icing, add the food coloring gradually until you achieve a deep blood-red color—gel food coloring works best as it won't thin out your icing. The corn syrup is the secret ingredient that gives the icing its glossy, wet-looking finish that truly mimics fresh blood. If you want to add an almond flavor dimension to your cookies, incorporate 1/4 teaspoon of almond extract along with the vanilla.
Variations and Customization
These vampire bite cookies are wonderfully adaptable to different tastes and occasions. For a more adult version, consider adding a drop of peppermint extract to the icing for a subtle minty undertone, or dust the finished cookies with edible silver or black shimmer dust for an even more gothic appearance. You can create different levels of gore by varying how much icing you allow to drip from the bite marks. Try using different shaped cookie cutters to create neck-shaped cookies or round cookies that resemble a bitten neck. For variety, make half the batch with the traditional red icing and the other half with dark purple or black icing for a different supernatural creature effect. The base sugar cookie recipe also works beautifully with other Halloween decorations like spider webs or ghosts.
Serving Suggestions
Present these vampire bite cookies on a black or dark purple platter for maximum dramatic effect at your Halloween party. They pair wonderfully with hot chocolate topped with whipped cream and chocolate shavings, or for adult gatherings, serve alongside mulled wine or spiced apple cider. Create a dessert table theme by arranging them with other Halloween treats like chocolate spiders or ghost meringues. For a fun presentation, place them in clear cellophane bags tied with black ribbon and attach small tags that read "Beware: Freshly Bitten" for party favors or trick-or-treat alternatives. Stack them on a tiered stand interspersed with fake cobwebs and plastic spiders for a truly spooky display.
 Save
Save These Vampire Bite Sugar Cookies bring together the best of both worlds—the comforting, familiar taste of classic butter cookies with the playful, spooky presentation that makes Halloween so much fun. With just one hour from start to finish, including cooling and decorating time, you can create two dozen theatrical treats that will be the talk of any Halloween gathering. The simple ingredient list means no special shopping trips, and the decorating process is easy enough for children to help with, making this a wonderful family baking project. Whether you're a seasoned baker or a Halloween enthusiast looking for an approachable festive recipe, these vampire bite cookies deliver delicious results with impressive visual impact.
Recipe FAQ
- → What gives the red icing its glossy shine?
The red icing achieves its glossy finish through the addition of light corn syrup, which adds shine and smooth texture.
- → How are the bite marks created on the cookies?
After cooling, bite marks are gently made using a straw or the end of a chopstick, creating indentations for the red icing.
- → Can I substitute the all-purpose flour for a gluten-free option?
Yes, gluten-free flour blends can be used as a substitute to accommodate dietary needs without compromising texture.
- → How long should the dough be chilled before baking?
Chilling the dough for 30 minutes helps with easier handling and prevents spreading during baking.
- → What optional decoration enhances the spooky effect?
Adding black or dark red gel icing for detailing enhances the bite marks and adds dramatic depth to the decoration.